 Guest post by Caroline Kelley Guiding Our Children Through |
 | Caroline Kelley, M.Ed is first and foremost, a mother. Following, she is an early childhood educator of over 20 years and humane educator spreading peace throughout our education system. |
0 Comments
 | Bio: Victoria Grageda-Smith was born in the Philippines, the eldest of ten children in a family of humble means. Through full academic merit scholarships, she graduated Magna Cum Laude in her pre-law class and ranked among the top of her law class at The College of Law, University of the Philippines. |
She also earned a Master of Law degree from The University of Michigan School of Law. She served as associate counsel in a large, prestigious Manila law firm before becoming the only female attorney in the twenty-five-lawyer legal department of one of Southeast Asia’s oldest global corporate conglomerates. She was on track to establish her own law firm when life threw the proverbial wrench at her well-laid plans: she met, fell in love with, and married an American, and moved to the US to build a life with him. The challenges of an immigrant having to start over in both personal and professional lives, plus motherhood sans her support network of Philippine family and friends amid her husband's frequent career-related travel, compelled her to choose to be the at-home parent. It was while raising their young children she rediscovered a childhood passion: creative writing. She wrote while doing laundry, cooking, and waiting for their children to get out of school, private lessons, sports, and other extracurricular activities, and after tucking them into bed. Now, she’s an award-winning author published in fiction, poetry, and nonfiction.
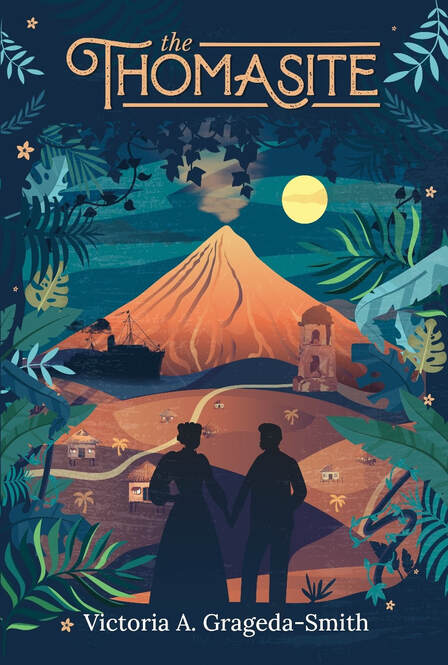
Her debut novel, THE THOMASITE, will be published and released by Orange Blossom Publishing in spring 2023. It’s a literary historical women’s fiction novel that evokes THE KING AND I meets WAR AND PEACE in US colonial Philippine Islands. She's also the author of the Driftless Unsolicited Award-winning novella, FAITH HEALER (Brain Mill Press, 2016). The first time she submitted to a nationwide short story writing contest, her story, “Portrait of the Other Lady,” won first place, including publication in a Los Angeles area newspaper (Ventura County Star, November 28, 2004). Her poems, some of which have been honored with distinction in poetry contests, are published by literary journals that include, among others, the Crosswinds Poetry Journal, New Millennium Writings, Reed Magazine, Lyrical Iowa, and Dicta (The University of Michigan School of Law literary journal). Her essay, “Gatekeepers and Gatecrashers in Contemporary American Poetry: Reflections of a Filipino Immigrant Poet in the United States,” appears in the anthology, OTHERS WILL ENTER THE GATES: IMMIGRANT POETS ON POETRY, INFLUENCES, AND WRITING IN AMERICA (Black Lawrence Press, 2015). She’s also the author of a new literary women’s fiction book manuscript, DAUGHTERS OF THE BAMBOO, a collection of Filipino American immigrant tales of love, dreams, struggles, and hope, and of THE ACCIDENTAL ITALIAN, a blended women’s fiction-romance genre novel manuscript. Among her works-in-progress are THE JAPANESE LIEUTENANT’S WOMAN, a novel set during the Pacific War in World War II, and MOTHER OF EXILES, a poetry manuscript anchored on the theme of the Filipino diaspora and immigrant experience. Follow her in VictoriaGSmith.com, Facebook at Author Victoria G. Smith, Instagram, and Twitter @AuthorVGSmith.
When Victoria isn’t writing, she likes to read or walk in the woods and on the beach with her husband, dogs, and their visiting children at their island home in the Puget Sound. Having imagined herself in her youth exclusively as a professional career woman working outside the home, she's surprised herself by being a happy homebody who, according to family and friends, is also a great, intuitive cook with a like talent and passion for home and garden design.
Interview with Victoria Grageda-Smith
Thank you Victoria G. Smith for taking the time to chat with me.
When did you know you wanted to become an author?
At ten years old! I had a love for history early on, and, additionally inspired by the Nancy Drew books, I started writing an adventure novel about a girl archeologist traveling to Egypt to investigate a mystery in the pyramids. Unfortunately, that manuscript (handwritten in an elementary school lined notebook) got lost during my family’s move to a new home. I wondered what that book could have been after I watched the movie, Lara Croft, many years later. Why, that was almost the same character I had attempted to create!
When did you first consider yourself a writer?
Are you kidding? I question it every day! For me, this is like the question, "When would you consider yourself having 'made it' as a writer?" I don't know the answer to this. What I do know is that writing is the only vocation that, for me, doesn't feel like work, that I'm so happy to be doing; when the hours seem to pass almost in the blink of an eye; when I'm happiest. So, I guess, that's what makes me a writer: I'm happiest when I'm writing.
Who is your biggest inspiration?
As an author, I’d say my biggest inspiration is the Philippine national hero, Dr. Jose Rizal--who wrote the two classic novels, Noli Me Tangere (Do Not Touch Me) and El Filibusterismo (The Filibuster). He was a polymath. Not only was he a doctor of optometry, he was also a painter, sculptor, and writer known for his novels, poetry, and patriotic essays and letters. I’d wanted to be like him since I was a child learning about him in elementary school.
How do you come up with your ideas?
I get my ideas from what I love: history, nature, other writers’ works, and my family’s experiences living and traveling around the world. Sometimes, I get them from the news.
Are your characters inspired by or based on real-life people?
Many of them are, although my characters are mostly amalgamations of people I’ve encountered, including various aspects of my personality or who I imagine I could be if I were living other lives.
What comes first, the plot or the characters?
For me, it's the character. A vision of a character comes to me--along along with her voice and backstory, and the plot, then, almost writes itself.
When I’m writing a new novel, I’m dreaming in its own dream world. I avoid reading or watching anything that takes me away from the voice in which that dream speaks to me. I listen to music most conducive to that voice. I also avoid reading novels that have too similar a topic or tone for fear of infecting my voice with theirs. I always strive to add unique value to what’s already out there--published. And there is hardly a greater contribution a writer could give to the literary world than the uniqueness of one’s voice.
When I’m writing a new novel, I’m dreaming in its own dream world. I avoid reading or watching anything that takes me away from the voice in which that dream speaks to me. I listen to music most conducive to that voice. I also avoid reading novels that have too similar a topic or tone for fear of infecting my voice with theirs. I always strive to add unique value to what’s already out there--published. And there is hardly a greater contribution a writer could give to the literary world than the uniqueness of one’s voice.
What would you say is your most interesting writing quirk?
When faced with a blank page, I write based on a rhythm that comes to me. Along with the rhythm comes the mood or “voice” of what seems desirous of being written. Then, I strive to provide the words that suit such rhythm and mood and the idea for a poem or story I aim to write. I suspect I’m a musician at heart; the trouble is--I never learned to read notes!
How did publishing your first book change your writing career?
It opened many doors for me in the literary and publishing world. I gained friends and networking opportunities with other writers. From the latter, I learned more about writing, which, in turn, improved mine. What I loved was getting invited to speak before readers and other writers. Writing is such a solitary activity, which I love, but I also love being with other people--at the right time and place, that is. I guess I’m a paradox: I’m an introvert who cherishes stretches of solitude. But I’m also a friendly, gregarious extrovert who enjoys a social setting. Thus, being a published writer satisfies both sides of me.
Have you ever gotten writers block? How did you work through it?
Yes. It happened to me many years ago when I was attempting to write the current WWII novel I’m working on again. The challenge came when I had to write a horrific scene of sexual assault committed against a set of women characters. I felt I did not have enough information and emotional bandwidth to write that scene in an authentic and respectful way for the victims. Thus, I took a break from writing that novel until I’d done more research and found the right tone with which to write the scene. After two decades, I think I can do it.
What are you working on now?
I’m working on a novel set during World War II in the Pacific. There are many books about WWII, but they’re mostly set in Europe, so I wanted to write a story that features some of the major events of the Pacific side of the war.
What advice would you give aspiring authors?
In addition to you being judged based on the quality of your work, publishing is a numbers game. The more you write, the more you can improve your writing, the more you can submit to publishers, and, therefore, the more you can publish. Thus, write every day. Soon, you’ll have a body of work ready for submission. Almost everything I wrote in the past twenty-five years has been published. But that was twenty-five years of continuous writing. It’s worth it. And I’m still at it just as passionately as I did the first time I wrote with the idea I was going to be a writer.
What do you like to do when you're not writing?
I like to travel and experience other cultures. When that’s not possible, I like to walk in the woods or along the beach--and, of course, read.
What are three things that are unique about you?
Firstly, I’d say I’m an intuitive cook with the uncanny ability to reverse-engineer many gourmet dishes I enjoy in restaurants and others’ homes--although I have not professionally studied to become a cook. Secondly, I have very sensitive senses of taste and smell--which could be a curse or a blessing, depending on the circumstances, as you can imagine. They have certainly been a blessing to me as a cook and as a writer describing a scene to allow the reader to experience the tastes and smells of the setting. My acute sense of smell sometimes makes me fantasize about being a perfumier--especially after I'd read that hauntingly shocking novel by Patrick Suskind, “Perfume: The Story of a Murderer.” Not that I dream of becoming a murderer, of course! Finally, and although I don’t think this is unique enough, I’d say I’m multitalented. My problem has always been deciding on which artistic talent I should focus on. In addition to being a writer, I think I could be a painter, sculptor, or photographer. I’ve always suspected I could be good at anything I put my heart and mind into doing. Yet, as an immigrant, I found this wasn’t how it worked. You don't decide to be one thing forever. Life happens, allowing you to apply yourself in other ways you’re good at to adapt to your changed circumstances. Thus, I was a lawyer in my native country, but when this proved to be an almost impossible career for me to pursue in the US, I realized I'd been given the gift of a second chance at trying my hand at something I've loved since childhood: creative writing.
Orange Blossom Publishing Books by
Victoria Grageda-Smith
Guest post by Marcus Herzberg
The Night Clerk's Wisdom
A Gentle Warning
“Kiss ‘em and hug for as long as you can.”
As I was chewing the fat with the night clerk at the community college where I taught, I mentioned that my wife and I were expecting our first child. Having children of his own, he’d shared some stories and the advice above.
“They grow up so fast,” he added wistfully.
I didn’t take the man to mean merely that we should rub cheeks with infants. I thought he meant that we should show our children affection in many ways during our limited time with them. In my twelve-plus years as a father, now with two sons, his words have floated back into my thoughts many times. With reflection and experience, I now see the night clerk’s gentle warning as sage advice about the importance of parental affection.
How Do We Show Affection?
Let me explain what I do and do not mean by affection. Showing affection to children
doesn’t mean babying them, or giving them everything they want, or treating them like they’re the center of the universe. We don’t show affection by making life easy for our children or fixing all of their problems for them. Having children do chores or clean up their own messes has nothing to do with affection and everything to do with responsibility. Similarly, making your kids get off their screens and play outside for a couple of hours is an act of caring, not cruelty.
The type of affection that I advocate is any way in which we genuinely convey our love for our children. This can take many forms. To use the night clerk’s examples, these include physical displays, which too often fall out of our interactions as our children age.
But there’s no reason that they have to disappear, and an impromptu hug, “just
because,” can carry a powerful message to an adolescent who feels increasingly alone, confused, or misunderstood.
Verbally conveying affection to children in both conventional and unconventional ways, is also important. Many parents make it a habit of telling their children they love them before they leave the house or go to bed. But using these same words instead of taking a harsh tone to address a child’s mistake can help convey connection and combat alienation. Similarly, telling them, “I’m worried about you,” to preface an uncomfortable conversation about a problem behavior can remind our children that our care and concern for them is our driving motivation.
We can also show affection less directly, for example by making the time to do
something with or for children that they really enjoy. Maybe that’s playing catch or
going fishing or making their favorite dinner or dessert. And sometimes, affection is
best conveyed by just listening when our children have something that they’re trying to say, regardless of how busy we are or how important it seems at the time.
Losing that Loving Feeling
There are a variety of reasons that expressions of parental affection wane as children
age. In terms of physical and verbal expressions, some have the attitude that it’s not
“proper” once kids get past the “cute” stage. It’s as if some unwritten rules of etiquette suddenly kick in after they lose a couple of teeth, requiring fewer hugs and I-love-yous.
Now it’s certainly true that many children become less affectionate as they get older, but I think it’s a two-way street. And sometimes, I think the kids are just reflecting parental attitudes, including fear of emotional vulnerability.
Then there’s the fear that any display of physical affection to a child, from a parent or others, can be a slippery slope toward sexual abuse. If you doubt that this mindset
exists, it’s not hard to find internet forums, comment boards, etc. where everything from accepting an awkward kiss from a two-year-old niece or nephew to high school sex education is labelled as “grooming.” As a career educator, I understand the reality of child sexual abuse, but there is a broad line between familial affection and this sort of evil. Vigilance on this issue is helpful. Paranoia is not.
Yet another reason for the waning of parental affection is the belief we need to “toughen up” kids for life as an adult. Kids today are “soft,” so the thinking goes, and we don’t want to raise a generation of wimps.
A couple of observations are worth making here. First, in a prospering society, every
generation will have lives that are relatively easier than the previous ones. The house that my father grew up in had no indoor plumbing, and at one point during the Great Depression, his family’s usable income dwindled to a dime. I’m surrounded by smart appliances that I can monitor with my phone, from which I order a five-dollar latte that I pick up on my way into work. I imagine my ancestors who walked across deserts and toiled in coal mines hanging their heads in shame.
However, despite these changes in wealth and convenience, each generation has
challenges (e.g., recessions, wars, pandemics) that make life difficult. And despite
generational advantages, many people of all eras experience poverty, job loss, broken relationships, and the death of loved ones. In short, life is hard for many people at various times, but it’s difficult to see how parental affection would make any of this worse. What percentage of people who have overdosed on opioids in the past decade, or are currently in prison were shown too much love by their parents?
Secondly, kids are “soft” today for many of the same reasons that adults are soft: we
have technology and a demand economy that has intensified the emphasis on
immediate, ephemeral gratification. Most of us are required to do very little that makes us uncomfortable for very long. Moreover, we are herded by algorithms to seek out superficial digital interactions and virtual spaces that too often narrow our experiences and perspectives rather than challenge them.
However, this softness comes with a hard edge: we’re becoming more isolated and
disconnected, and so are our children. Couple that with the fact that social media
influencing, corporate marketing, and cyber-bullying have added to the challenges of adolescence that fray family bonds. Yet I’m still failing to see how more parental
affection would negatively impact this dynamic. Affection is not the enemy of strength, or resilience, or the critical thinking that will be required to deal with the problems of tomorrow.
Our Challenge
Despite the busyness of our daily lives and all of the accompanying distractions, we
need to continue to look for opportunities to show our children affection in genuine
ways. When my nine-year-old comes down the stairs with a cheery “good morning,” an un-caffeinated grunt from me is not an appropriate reply. When he interrupts my
grading to tell me a detailed story that I’m really not that interested in, I need to listen without looking impatient.
Continuing to show affection for our kids makes their lives better, and ours as well. My twelve-year-old routinely thanks his mother and I for making him dinner . . . unsolicited. The other day, when I picked him up from an outing with his friends, he hugged me . . . in front of them . . . in the middle of a busy store. You’d better believe I hugged him back. Just because they grow up fast, doesn’t mean you have to let go.
 | Marcus has worked as an educator and teacher educator for three decades, all the while not-so-secretly aspiring to become a writer. His satirical novel, The Pop Tart Insurrection, was pubished in 2021, and its sequel, Jock Sniff America, was released in 2023. Marcus has also written several screenplays and his dramatic novel, Everything Counts, was a finalist in the Ohio Writers Association Great Novel contest. Marcus' books are available through his website, www.marcusherzberg.com. |

Bio: PJ McIlvaine is a prolific author/screenwriter/writer/journalist.
PJ is the author of the Amazon US best-selling VIOLET YORKE, GILDED GIRL: GHOSTS IN THE CLOSET (April 2022, Darkstroke Books), her debut middle-grade supernatural historical mystery adventure about a sassy poor little rich girl/Titanic survivor who sees ghosts in 1912 Manhattan.
PJ’s debut picture book LITTLE LENA AND THE BIG TABLE (May 2019, Big Belly Book Co.), with illustrations by Leila Nabih, is about a determined little girl tired of eating with her annoying cousins at the kid’s table, only to discover that the grown-up big table isn’t much better. Her second published picture book, DRAGON ROAR (October 2021, MacLaren-Cochrane Publishing), illustrations by Logan Rogers), is about a lonely, sick dragon who has lost his mighty roar and the brave village girl who helps him find it again. PJ is also under contract with Oghma Creative Media for a series of Creature Feature picture books (2023-2024).
PJ is also a co-host and founding member of #PBPitch, the premiere Twitter pitch party for picture book creators.
PJ has been published in numerous outlets including The New York Times and Newsday. PJ also does features and interviews for The Children’s Book Insider newsletter.
Also, PJ’s critically acclaimed Showtime original family movie MY HORRIBLE YEAR with Mimi Rogers, Karen Allen, and Eric Stoltz, was nominated for a Daytime Emmy.
PJ lives in Eastern Long Island with her family along with Luna, an extremely spoiled French Bulldog, and Sasha the Psycho Cat.
Interview with PJ McIlvaine
Thank you to author PJ McIlvaine for taking the time to chat with me.
It's a joy to get to know the Orange Blossom Publishing authors better!
It's a joy to get to know the Orange Blossom Publishing authors better!
When did you know you wanted to become an author?
I knew I'd like to be an author as a young kid.
When did you first consider yourself a writer?
I've never not been a writer, let's put it that way. It's in my genes.
Who is your biggest inspiration?
My maternal grandmother Charlotte Barbaret DeConchy.
How do you come up with your ideas?
I wish I knew. They come from everywhere and the past, present, and the future.
Are your characters inspired by or based on real-life people?
Yes
What comes first, the plot or the characters?
Both!
What would you say is your most interesting writing quirk?
I can be obsessive playing the same songs over and over as I write.
How did publishing your first book change your writing career?
It didn't. But it gave me the confidence to challenge myself and think bigger.
Have you ever gotten writers block? How did you work through it?
Do something else and let my subconscious do the heavy lifting.
What are you working on now?
A couple of novels and screenplays.
What advice would you give aspiring authors?
Patience. Persistence. Passion.
What do you like to do when you're not writing?
I like to bake.
What are three things that are unique about you?
I'm French. I'm passionate. And I love Nutella.
Orange Blossom Publishing Books by PJ McIlvaine
Guest post by Tricia Easter
Writing for Your Mental Health
It wasn’t until my 40’s that I started a consistent writing practice to support my mental health. Before I had always written in a journal off and on. My writing practice was the outlet I needed to heal debilitating anxiety and rebuild my self-trust, which I lost because of the anxiety.
I first started journaling daily to document my three-year intensive spiritual study of the different angels and archangels. While I had anticipated results from my spiritual studies, I was surprised about the impact my writing practice had on my anxiety. The cathartic nature of writing proved to be very healing for my mental health.
Benefits of Writing
Something as simple as putting pen to paper can be transformative. Writing has the ability to align our mind, body, and soul so that we know the direction we need to go. It helps to clear our mind wo that we can feel calm and comforted. Done consistently, writing can extinguish the flames that ignite anxiety. With the shame and stigma associated with mental health, writing is a safe outlet for us to express ourselves openly and honestly. Below are three ways writing is beneficial for our mental health.
Express and Process Emotions
Sometimes when we’re experiencing anxiety, all our feelings get lumped into feelings of anxiety, stress, and overwhelm, just to name a few. Writing can help us sift through our feelings so that we have clarity about exactly what we’re feeling, what caused that feeling, and if there’s anything we need to do differently in the future.
Gaining clarity about our emotions is a big step in uprooting anxiety. When we’re feeling frustrated or angry about something, writing in a journal is a healthy outlet, allowing us to hash everything out. Understanding exactly what we’re feeling helps to ease anxiety because we can then process these emotions.
Gaining clarity about our emotions is a big step in uprooting anxiety. When we’re feeling frustrated or angry about something, writing in a journal is a healthy outlet, allowing us to hash everything out. Understanding exactly what we’re feeling helps to ease anxiety because we can then process these emotions.
Find Our Voice
Writing helps us to connect with our true authentic self, who we are at our core. With busy and demanding schedules, it’s easy to lose touch with ourselves, and anxiety is a reminder that we need to reestablish that connection. I’ve noticed that many people who have anxiety (myself included) prefer to hide their true nature out of fear of judgement or persecution from others. And in hiding ourselves, we’re also not speaking up for ourselves. Many of us don’t really know what our own voice sounds like.
Writing allows us to find our voice as we start to ask ourselves questions and answer them honestly. How do we feel about certain situations and people? What do we believe about the world around us? What’s important to us? What are our boundaries? Writing creates space for us to hear and reclaim our voice and express it in a safe way. Expressing and processing our emotions plays a big part in helping us find our voice too.
Writing allows us to find our voice as we start to ask ourselves questions and answer them honestly. How do we feel about certain situations and people? What do we believe about the world around us? What’s important to us? What are our boundaries? Writing creates space for us to hear and reclaim our voice and express it in a safe way. Expressing and processing our emotions plays a big part in helping us find our voice too.
Creative Outlet
Whether you write in a journal or for a specific genre, writing gets your creative juices flowing. Being creative is very therapeutic. Creating helps us to build our confidence, which can take many hits when dealing with mental health issues. Being creative also teaches us to listen to and trust our intuition, which we’re tapping into as we write.
Writing and creating regularly also helps us to develop the capacity to think of new and different solutions to our problems. We’re better equipped to think “outside the box,” which helps when dealing with anxiety. Creativity helps us with self-expression too, because for many of us anxiety is a sign that our souls are
screaming to be seen and heard.

Start Your Writing Practice
I recommend a writing practice for everyone who has anxiety. Writing in a journal, writing a memoir sharing experiences, or doing some creative writing all support our mental health. Writing in whatever style lights us up sets healing in motion. The more we write, the more we shed light on our mental health which paves the way for deep healing. Below are three ways to start a writing practice.
Get Cozy
Feeling cozy helps to settle our frayed nervous system and ensures we keep showing up daily for our writing. We’re more likely to show up for our writing practice if we enjoy how we feel doing it. The cozier we feel writing, the more we will look forward to it. We should make sure we’re writing in a comfortable spot, whether it’s on the couch, at the park, or at our desk. Lighting a candle and pouring a cup of tea are some examples of things we can do to create a cozy setting. Establishing a comfortable writing environment signals to our nervous system that we’re safe, allowing us safely navigate anxiety and heal it.
Have Fun
Having fun is along the same lines as getting cozy, except we’re tapping into our inner child. As a young girl I LOVED picking out fun journals, cool pens, and cute folders. Thinking about what colors and patterns we enjoy allows us to have fun with our writing. If we like our writing tools, we’re more likely to show up and write every day. Just seeing my beautiful notebooks gets me excited about writing in them.
A Little Bit of Structure
I’m hesitant to recommend adding structure to something creative, however setting a daily routine to write helps us to show up consistently. Adding some structure helps to make daily writing a pattern. And writing gets easier the more we do it. It gets easier to tap into that flow where the words come easily. Committing to a general time every day ensures that we get our writing in. We can select a time that works for us, such as in the morning before our day begins or before bed. Also, setting an intention for how much we want to write is helpful. For example, aiming for a certain word count or writing a page a day in a journal. Even if it seems like we’re writing gibberish, knowing ahead of time how much we intend to write helps us to get in the habit of getting words on paper (or our computers).
The purpose of a writing practice is to build self-trust, to find and use our voice, and to ultimately heal anxiety. Using our writing as a tool helps us to safely lean into our anxiety and learn from it. Adopting a writing practice will help us understand anxiety and how it affects us. Writing is a tool that has the potential to free us from anxiety.
The purpose of a writing practice is to build self-trust, to find and use our voice, and to ultimately heal anxiety. Using our writing as a tool helps us to safely lean into our anxiety and learn from it. Adopting a writing practice will help us understand anxiety and how it affects us. Writing is a tool that has the potential to free us from anxiety.
 | Tricia Easter is the author of Bold Trust – 6 Steps to Unravel the Long-Term Effects of Gaslighting, Unapologetically Trust Yourself, and Heal Anxiety, which is available on Amazon and Barnes & Noble. Tricia is a certified health and wellness coach and mental health advocate who’s passionate about helping others heal anxiety and destigmatizing mental health issues through open and honest conversations. She writes about her experiences healing anxiety and the truths she’s uncovered on her blog. Tricia also has certifications in nutrition, angel card reading, and as an angel guide. She has a bachelor’s degree in environmental science and a master’s degree in business administration. Visit angelsgoldhealing.com, Substack, or Instagram to subscribe to Tricia’s newsletter or to listen to her podcast Freedom from Anxiety. |

Bio:
Tamatha Cain is a former musician and bandleader. She graduated summa cum laude from the University of North Florida with a degree in English. Her work has appeared in national and international publications. Awards include: 2022 Florida Book Award, 2020 Royal Palm Literary Award, and grand prize in The Experience Poetry Competition. She writes reviews for Southern Literary Review, and is a member of Women's Fiction Writers Association, Women Writing the West, WFWA Historical Fiction Affinity Group, and Florida Writers Association. She is a wife and mother of three and lives in a hundred-year-old bungalow in North Florida, in close proximity to the historic locations found in her debut novel Song of the Chimney Sweep.
Learn more about her on her website or follow her on Twitter or Instagram.
Interview with Tamatha Cain
Thank you to author Tamatha Cain for taking the time to answer my questions.
It was a joy to get to know you better.
It was a joy to get to know you better.
When did you know you wanted to become an author?
It first occurred to me that I was a writer when several teachers encouraged my writing.
When did you first consider yourself a writer?
I can't remember not thinking of myself as a writer. I was other things as well, but always a writer.
Who is your biggest inspiration?
I love to research a wide variety of topics, and the stories behind them get my imagination going to all sorts of places.
How do you come up with your ideas?
I keep a note on my phone to jot down ideas. One thing in my writing life which never gives me trouble is coming up with ideas.
Are your characters inspired by or based on real-life people?
Very, very often they are inspired by real people. Sometimes it is only a mannerism or a particular part of their personality, but I collect interesting traits for future use.
What comes first, the plot or the characters?
The main character usually comes first, but not always. The idea for a book concept comes first, then I need characters to live it out.
What would you say is your most interesting writing quirk?
I cannot listen to music while writing. As a former musician, I find it way too distracting.
How did publishing your first book change your writing career?
It was great to have that book to show people, and when that first book won a Florida Book Award, it was an uplifting and encouraging experience.
Have you ever gotten writers block? How did you work through it?
Not really. I have more of a problem with procrastination and perfectionism. If the story is fully fleshed out, then the scenes tend to come rather easily. I have hit roadblocks when faced with edits as I still haven't found the most comfortable way for me to make changes without getting lost in the manuscript. I enjoy using Scrivener, but sometimes it's too easy to move files and suddenly the flow of the story is upset in ways I can't see. That is not fun.
What are you working on now?
I recently set aside an idea I've been researching for several years to work on a new idea I'm terribly excited about. It's in that phase where one is terrified someone else has already done it, but I'm going for it anyway.
What advice would you give to aspiring authors?
Try to tune out all the noise of the publishing world as much as you can, at least while you are writing. Social media makes it seems as though everyone is getting a book deal and it's easy to compare yourself and your progress. Focus on your work and making it the best it can be and then tune back in to the world of queries and pitch events.
What do you like to do when you're not writing?
My husband and I love to watch British mystery shows, lots of PBS Masterpiece Theatre lately. Also, we travel to watch our favorite baseball team. Trying to see them play in every stadium.
Tell me, what are three things that are unique about you?
My dad was in the Air Force, so I lived in four countries and seven different states before I turned 18. I live in a house that is over 100 years old. I used to be a bandleader, and I also used to own a custom cake shop.
Orange Blossom Publishing Books by Tamatha Cain
 |  |
by Arielle Haughee
Writing Workshop Descriptions:
You Gotta Sell It!
You have a great idea for a workshop and there is a conference coming up. Time to fill out the faculty application. How can you give yourself the best chance of being selected as a presenter? Write a stellar workshop description! Many times writers view the description as a little nonfiction blurb stating the basics of what they will be sharing with the group. Incorrect. You are selling your workshop, and not just to the person selecting faculty, but to the attendees as well. Writers will be more likely to select your workshop if you show them they will be missing out if they skip it.
So what do you include and what do you leave out? Check out the workshop description formula below.
So what do you include and what do you leave out? Check out the workshop description formula below.
Use Inviting Language
When you use fun, energetic language, you are showing potential attendees that it will be a fun, energetic workshop. For example, instead of saying “learn” you could use the word “discover” or “explore.” Amp up your word choice with your verbs to make them more active instead of passive. This also goes for how you describe the workshop content. Be accurate, but interesting. Here is an example:
Instead of: “Learn how to write a setting your reader will enjoy.”
Try this: “Discover how to make your reader fully immersed in a vibrant setting.”
Both of those describe the same content, but one is presented in a more energetic way. Language is a tool to entice people to attend your workshop.
Instead of: “Learn how to write a setting your reader will enjoy.”
Try this: “Discover how to make your reader fully immersed in a vibrant setting.”
Both of those describe the same content, but one is presented in a more energetic way. Language is a tool to entice people to attend your workshop.
Show How YOUR Version Is Relevant
There are many identical writing workshops out there. Just like how you need to make your book stand out from similar ones, you need to do the same with your workshop. Hundreds upon hundreds of people are offering content on worldbuilding for example. What is your take on it? How is your workshop different from the others? Maybe you have info on recent trends such as worldbuilding for steampunk. Perhaps you’ve come up with your own method, the “Worldbuilding Wheel.” Be sure to include something in your workshop that is unique and would be a draw to those who have been to other workshops on the same topic.
Start With a Hook
Opening lines are key! You’ve certainly heard that before. You can start with a question, an interesting fact, or a thought-provoking statement. Whatever it is, be sure the person MUST read the next line. Mary Ann de Stefano wrote this opening line for one of our conference workshops last year: “Dual timeline novels such as Gone Girl and The Time Traveler’s Wife are mega-bestsellers.” She immediately got my attention with this interesting, relevant fact. Two birds with one stone! This one is from Nancy J. Cohen: “Audiobooks are booming, and your book could be streaming into thousands of ears right now!” I feel a sense of immediacy when I read that; I must go! Try out different opening lines for your workshop and get feedback from your writing buddies. Remember you are selling it.
Next Squeeze in a Tiny Bio Blurb
You need to show the faculty chair and the audience that you are qualified to teach this workshop. The trick is to do it quickly without having an entire, paragraph-long bio in there. What phrase can you put in front of your name that gives you validity? See if any of these apply to you:
- award-winning author
- Amazon best-selling author
- critically acclaimed author
- multiple trilogy author
- multigenre author
- literary contest judge
- publishing consultant
- something else?
Now Three Things Attendees Will Learn
Look at your presentation slides and pick the three biggest topics your attendees will learn. You may be able to have more, depending on word count. Remember to amp up your word choice to make your description energetic and inviting. Sell it! You can either write a list in the form of a sentence or use bullet points. Check the directions where you’ll submit your workshop description. Sometimes they tell you to use bullet points. Here is the same example in both formats:
List sentence: “In this webinar, you’ll learn what every email newsletter must have, tricks and free tools to attract new people to sign up, and how to engage your audience so they open your emails.”
Bullet points:
“In this webinar, you’ll learn:
List sentence: “In this webinar, you’ll learn what every email newsletter must have, tricks and free tools to attract new people to sign up, and how to engage your audience so they open your emails.”
Bullet points:
“In this webinar, you’ll learn:
- What every email newsletter MUST provide
- Tricks and *free* tools to attract new people to sign up
- How to engage your audience so they open your emails”
Finally, One Big Takeaway
Now leave people with something that shows they can’t afford to miss this workshop. One secret is…to use the word secret. Here is one I use in my picture book writing workshop: “You’ll leave with a manuscript checklist full of insider secrets about crafting quality picture books.” You can also entice attendees by talking about “the number one thing” for a topic. “Leave knowing the number one thing all agents despise in a query letter.” Think about a key piece of information from your content, something people are definitely going to want to know. Then word it so they have to know what it is.

Two Examples
Author and pro blogger Erik Deckers gives a workshop called “Use Blogging to Build Your Book Sales & Personal Brand.” See how he uses each part of the workshop formula in his description:
If you want to find fans and loyal readers, you have two choices: run an expensive direct mail and public relations campaign, or a free and fun social media and blogging campaign. If you’ve got a laptop and an internet connection, you can build up your own audience of readers and book buyers. (hook)
Successful writers aren’t those who write better than everyone else, they’re the ones who promote themselves better than everyone else. They’re the ones with high sales, radio and podcast interviews, and seem to appear at all the conferences and panel discussions.
Pro blogger and marketing author (mini bio) Erik Deckers will discuss how to use social media to build your professional reputation, engage new readers, connect with other writers, and turn that network into new publishing opportunities, speaking engagements, and even new books. (list of what will be learned)
He’ll discuss how to start a blog and fill it with new content, the three blogging secrets every writer should know, and the one mistake every new author makes. (big takeaway)
Erik used all parts of the formula to create a workshop description that still sucks me in—and I’ve already seen this workshop twice!
Here is one I use for my self-publishing workshop:
Self Publishing 101: Ready, Set, Publish! Are you ready to get your book out into the world? Self-publishing doesn’t have to be an intimidating process. Author-publisher Arielle Haughee, owner of Orange Blossom Publishing, breaks down the process into a step-by-step timeline giving you the tools you need to make your book dream come true. She’ll discuss how to prepare your manuscript and the process of formatting, including how to obtain an ISBN, barcode, and Library of Congress number. She’ll also go over cover design, printing options (Who wants a hardback?!), and share marketing secrets for a successful book launch. You’ll leave with a step-by-step publishing checklist to take you from manuscript to book in hands!
Can you look through and find the hook, mini bio, list of what will be learned, and the big takeaway?
A Final Tip
Sometimes I write my workshop description before making my presentation slides. Here is an important tip: Make sure you save your workshop descriptions in an easy to find file. That way you can find what you said you were going to discuss. Always make sure your workshop content matches the description. You will eventually build up a whole menu of workshops you can do, and you’ll just have to copy and paste the description for the next time you need it. (I also keep a file of bios and write or paste the newest bio at the bottom.)
So remember to sell you workshop when you apply and you will be sure to have a room full of excited attendees!
So remember to sell you workshop when you apply and you will be sure to have a room full of excited attendees!
by Arielle Haughee
New Year Writing Strategies
It’s the new year, and people are thinking about resolutions, changing their lives, and expanding their horizons. Those are great goals to aspire and work toward. I’ve even been working on a few of my own in various parts of my life. Then I wondered how I could apply those lofty ideas to my writing.
Organize
How is the plot moving along? Are scenes jumping around like popping corn or fireworks exploding in the night sky? It might be a good time for a read through to see if your story is going where you want it to. Sometimes the characters take matters into their own hands, so to speak (mine do!). I rely on my trusty plot clock and outline to keep things moving as planned (with minor detours here and there – it keeps my characters happy if they know they get their way every now and then). Use whatever method works for you to keep things on track.
De-Clutter
This idea brings to mind the draft of my work-in-progress. Are the sentences too wordy, too full of detail? I love sensory details and sometimes get carried away scattering them everywhere. Now is a good time to print out a hard copy, arm yourself with a red pen, and cross out those that are just taking up space and word count. I can keep what gives the reader a mind’s view of the scene and gather up the excess to use somewhere else. Great details are never a waste!
Get Moving
Has a particular part of the story become too sedate and comfortable where it is? Curled up with an afghan in front of the TV? Well, it might be a great spot for your readers, but not your characters! Jostle them up a bit, and get them moving again… tick tock! Your readers will want to cozy up, but they want adventure, challenges, conflict, and romance!
Here’s an idea… as you make your way into the new year, try using whatever action words work for you, and apply them to your current work-in-progress. It might be fun to think about verbs that start with the same letter (scatter those cobwebs in the brain!). I came up with polish, prune, prod, and permeate. Choose your own letter and have a go at it!
Here’s an idea… as you make your way into the new year, try using whatever action words work for you, and apply them to your current work-in-progress. It might be fun to think about verbs that start with the same letter (scatter those cobwebs in the brain!). I came up with polish, prune, prod, and permeate. Choose your own letter and have a go at it!
 | Arielle Haughee (Hoy) is a seven-time RPLA-winning author, editor, speaker, and publisher. She is the owner of the small press Orange Blossom Publishing and was previously the Executive Vice President and Marketing Chair for the Florida Writers Association. She was honored with the President’s Award from FWA in 2020, and in 2021 Pling’s Party was awarded Children’s Book of the Year. She is also the recipient of a Purple Dragonfly Award for Piper and a Moonbeam Children’s Book Award for Sixth Sunday. She has a serious reading addiction, fantasy romance her absolute favorite, and loves nothing more than good conversation paired with a good wine. She is surrounded by males at home—a husband, two sons, and an energetic dog—and tries to integrate as much purple and flowers in the house as possible. |
Arielle Haughee
25 Sensory Winter Writing Prompts
25 Sensory details add realism to your writing and make the reader feel more connected to the work. Let’s get those creative juices going and do some practice working with sensory details as writing prompts. Look at the suggestions below and see if anything stands out to you. Can you combine more than one of these in a story?
Scent
- heavy maple sweetness combined with hints of vanilla
- chemical stench of plastic thrown on a fire
- flowery fabric softener embedded in a scarf
- rotten, waterlogged stump of a browning Christmas tree
- new leather on shiny boots
Tactile
- scratchy wool sweater making a rash
- granular salt being spread on the driveway
- warm, fluffy slippers
- sharp serrations on a bread knife
- velvety smooth ice covering a lake
Sound
- wind blowing through bare branches
- tired, strained rumble of the heat turning on
- crunch of compacting wet snow
- dishes being stacked in a busy diner
- church choir’s voices drifting out closed wooden doors
Taste
- savory root vegetables roasted with thyme
- dregs at the bottom of a fourth cup of black coffee
- citrusy glue on an envelope
- decadent, moist chocolate layer cake
- bitter stomach acid from a winter flu
Sight
There were so many great images, we included one extra!
   |  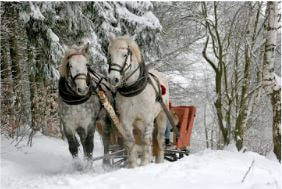  |
Have fun and let us know which one(s) you worked with!

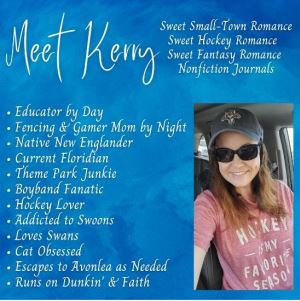
Guest post by Kerry Evelyn
10 Tips for a Successful Facebook Takeover
Why participate in a Facebook takeover or group hop? Easy! It's a fabulous way to grow brand awareness and grow your readership. So, how do you effectively manage a takeover? I've created these ten tips that will help you knock it out of the park.
1. Brand your graphics.
You want to make sure your posts stand out, are recognizable, and represent your brand well. Remember, you're building brand awareness. Use your brand color palette. Keep the graphics on theme.
2. End each post with an action item.
You want comments on each of your posts.
- comments boost the post and increase visibility
- be creative
- don't be afraid to be personal, you may just find your new one-click reader
- posts that automatically engage readers: activity posts, predictive text, etc
- gif comments
- personal repsonses
- ask questions, leave a clear call to action
3. Introduce yourself
Readers want to know who you are as a person. This connection is invaluable. Share as much or as little as you're comfortable with.
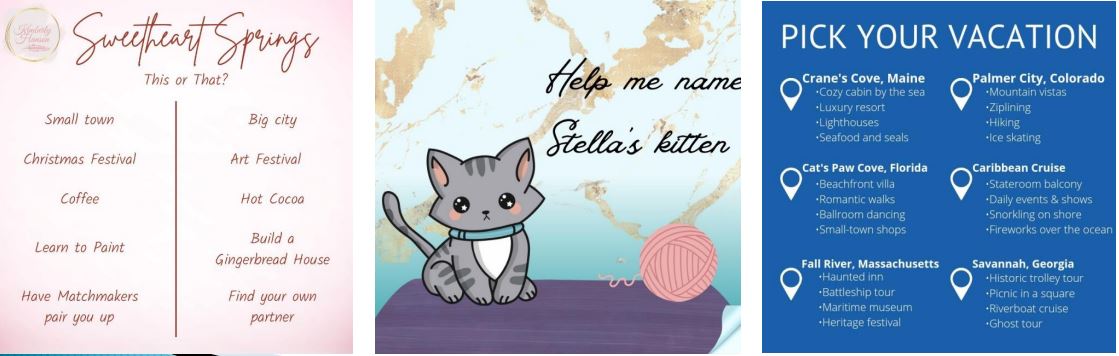
4. An opportunity for market research
Takeovers in groups that match your genre are a great way to discover what readers love! How can you accomplish this? With posts like these:
- This or That
- Leading Questions
- Preferred Bonus Content
- Polls
- Favorite Tropes
- Cover Preferences
- Comp Authors
- Where are they buying?
- Where do they spend their online time (FB, IG, other)
5. Story Specific Content
Promote a new release, a reader magnet, anthology or short story. Tie in your backlist. Have an action item related to your next story.
6. Everyone Loves a Freebie!
What content can you give away to tease your story, world or brand?
- Reader Magnet
- Printable Download
- Family Tree
- Map
- Recipe
- Coloring Sheet/book
- Trading Cards
- Team Roster
- Word Search
- Crossword
- Puzzle

7. Grow your following OFF Facebook
Use your posts to request follows in other places.
Some ideas might include:
Some ideas might include:
- Amazon
- Goodreads
- Blog
- BookBub
- Newsletter
- Tiktok
- YouTube

8. Number and Hashtag Your Posts
Make your posts easy to find for yourself, and readers. Hashtags make it easier for you to find posts to respond on comments. Readers know what to expect during your time. You can easily find the posts for later takeovers to copy or tweak.
9. Giveaways and Prizes
Readers LOVE giveaways and freebies.
What can you giveaway?
What can you giveaway?
- Gift cards (doesn't guarantee readers will buy your books)
- Credit for your eBooks or paperbacks ordered through you.
- Paperbacks
- Special Editions
- eBooks
- 2-D Swag: stickers, bookmarks, magnets
- 3-D Swag: pens, notebooks, lip balm
- ARC or review copy
- Unpublished books, or books with older covers
10. Choosing a Winner
There are so many ways to pick a winner. No need to overcomplicate it. Some of my favorites are:
- random generator
- prize wheel of names
- ask Google to pick a number
- choose winner instead of choosing randomly:
- Did someone join your newsletter?
- Follow you on other platforms?
- A Superfan?
Pro Tips
- Ask for moderator status if you want to schedule your posts (Pages CANNOT schedule, but they can ask for real-time pre-approval to prevent waiting)
- ALWAYS number and hashtag your posts
- Provided an entry deadline
- State if the giveaway is US, Continental US, or International
- End each post with an action item
- Let your personality shine through! They want to get to know YOU!
- Make sure they know where and how to find you
- Use emojis, white space, and bold/italics (Yaytext.com) strategically
- Post your pre-order link more than once (if it’s a Book Con takeover)
- Break up long info posts with short games
- NEVER give away (or let another author give away) a book you are trying to sell
- Ask for a variety of responses to minimize reply time
- Personal info
- GIF/Pic/emoji
- Automated/Predictive
- This or That
- Personal info
 | Kerry Evelyn is the author of the Crane’s Cove series, #sweetresortromance set in Coastal Maine, the Palmer City Voltage #sweethockeyromance series, a Guest Author for the Cat’s Paw Cove series, and several short stories that span multiple genres. Kerry received a Bachelor of Science in Education and Sociology from Bridgewater State University in 2000. A native of the Massachusetts SouthCoast, she changed her latitude and now calls the Orlando area home. Kerry loves God, books, cats, traveling, taking selfies, sweet drinks, and escaping into her imagination. You can find her on Amazon, Goodreads, BookBub, Facebook @KerryEvelynAuthor, Instagram @KerryEvelynBooks, and Twitter @theKerryEvelyn. Visit KerryEvelyn.com to subscribe to her newsletter and learn more! |

Author
Arielle Haughee is the owner and founder of Orange Blossom Publishing.
Categories
All
For Parents
Getting Into Writing
Giveaways
How I Met My Other
Picture Books
Publishing
Revision
Writing Craft
Writing Goals And Routines
Writing Life
Writing Picture Books
 RSS Feed