|
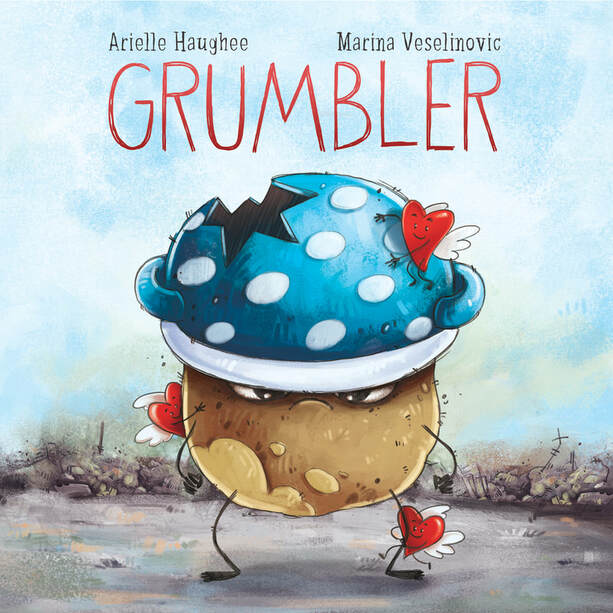
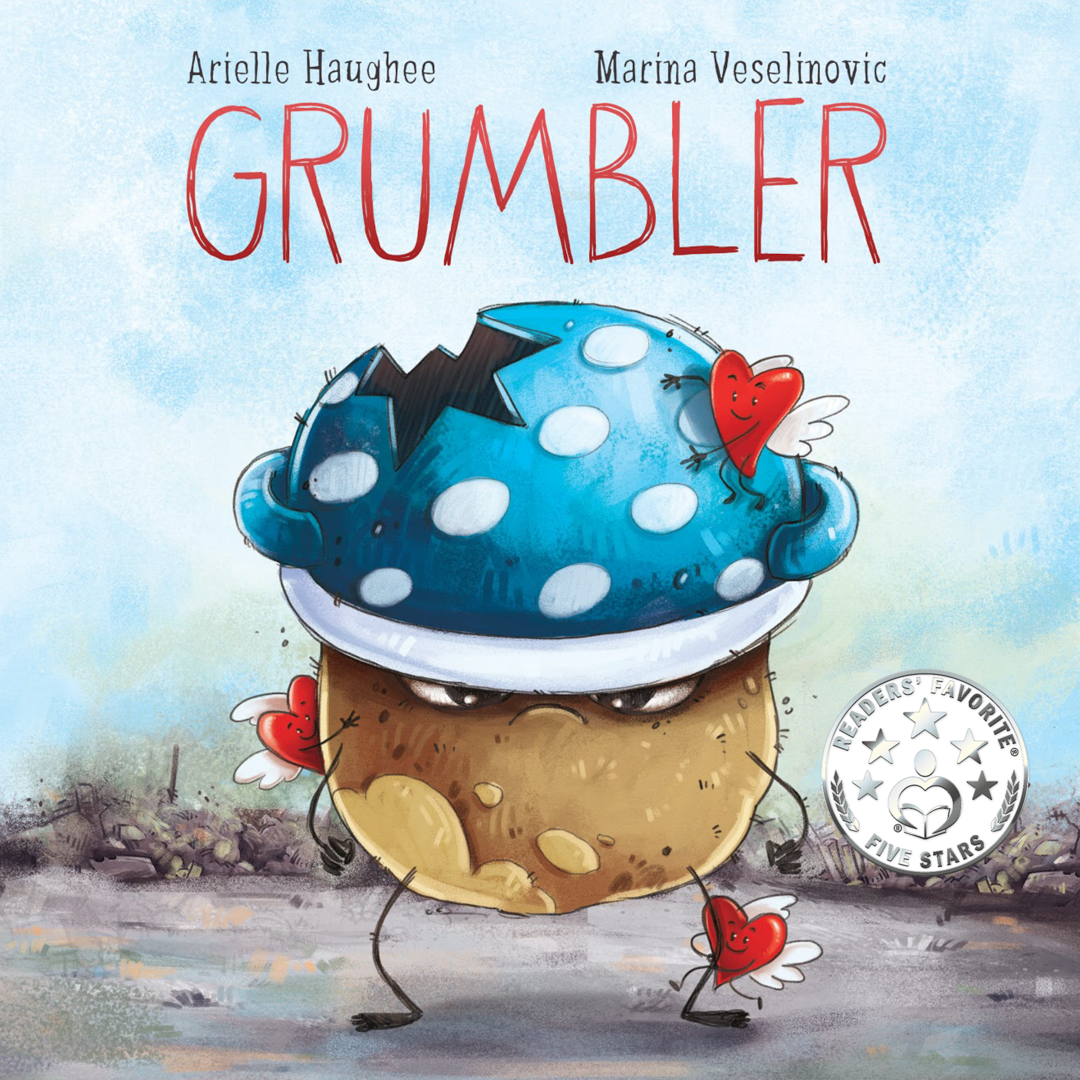
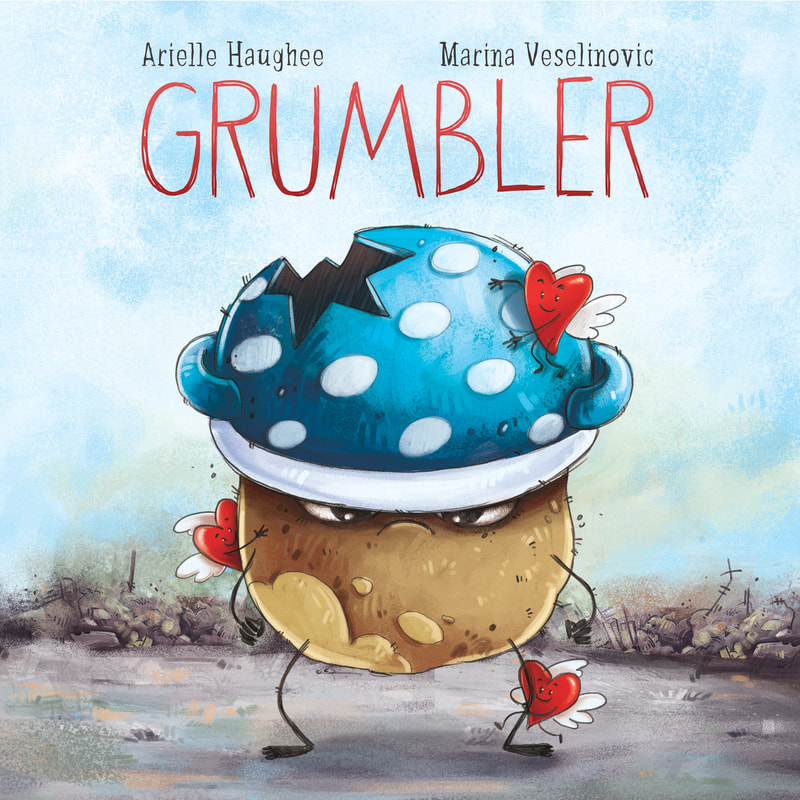
There is a multitude of talented illustrators out there. You just need to know where to look. Besides knowing exactly where to find these amazing people, there are other considerations you need to take into account before diving right in. The first question you need to answer is...do you even need to find one? Read on to discover the answer as well as many different places you can go to find an illustrator. Do You Need to Find an Illustrator?The very first consideration to make is if you are the one who needs to find the illustrator. If you plan on submitting your story to a publisher, large or small, they will be the ones choosing the illustrator. If you will be indie / self publishing, you will be able to select your artistic partner in your endeavor. A frequent question that pops up when I mention this is: will I get to have a say in the art if I have a publisher? The truthful answer is most likely not. Presses have an art director whose job is to make sure the art and the words flow together. Some smaller presses may let you have some input, but it will vary from press to press. So if you want to choose your illustrator, you will need to indie publish. Make Sure You Find Illustrators, Not ArtistsThere is a difference between someone who is an artist and someone who is an illustrator. An artist is anyone who makes art. An illustrator, however, has studied art for children as well as the process of creating a story utilizing page turns in a book. It is a specific skill set, much like a handyman can work on general things in your house, but an electrician has a specific knowledge and skill set. The handyman may be able to rewire your entire house, but they would likely not be able to do nearly as good of a job as an electrician. So be sure you are searching for illustrators and not artists. Consider the Tone of Your StoryBefore you begin your search, you need to examine your manuscript and consider what type of art will best match your story. Once you start looking at illustrators' portfolios, you may get swept away in the fun and choose art you like and forget about your story. When I was looking for an illustrator for Grumbler, I knew I wanted art that was humorous but also conveyed a sense of love. When I found Marina Veselinovic's profile, I knew it was a match. So reflect on your story. What is the tone? If you have a serious topic, you'll want a more somber style of art. A fun, upbeat tone would likely match something more whimsical. Be sure your art matches your story so the book will be a cohesive whole. Where to Find Illustrators on WebsitesThe internet is an awesome resource for finding illustrators. You could get lost for hours looking at art. (I certainly do!) Here are the top websites to find illustrators online as well as some notes about each:
Where to Find Illustrators on Social MediaIllustrators are on all varieties of social media, but the best place to find them is on Instagram since it is a picture-based platform. I like to follow accounts that share illustrations from lots of different artists so I can click on profiles and see more art. Here are the top accounts that feature lots of artists:
Where to Find Illustrators In-PersonLet's not overlook good old fashioned networking. Meeting in person gives you the chance to feel out if the two of you will have a good working relationship. (Check out this post by Sharon Lane Holm called What Illustrators Want Picture Book Authors to Know for a glimpse from their side.) Local writing groups are a great place to find illustrators, particularly if they are for children's writing. Search Meetup or Facebook for events near you. I've met illustrators in person that weren't right for my current project, but I saved their information for future ones. Finding an illustrator is one of the most fun parts of making a picture book. Enjoy the search and visualizing your words turned into pictures. You will be one step closer to having your story come to life!
8 Comments
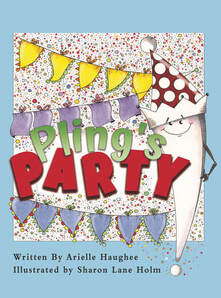
Being a creative is a challenge. Trying to use your creative talents with others can be even more of a challenge. A good working relationship is key for a project's success, and this is especially true for authors and illustrators who team up. This week, career illustrator Sharon Lane Holm gives us a window into the illustrator's perspective. What Illustrators Want Authors to Know By Sharon Lane Holm Trust me. We both want the same thing—to share a wonderful story with great illustrations. We both want to sparkle and stand out above all the rest. Trust me. Please try to not micro manage. Creative freedom is the best thing you can give to your illustrator. Allow yourself to be open to their ideas. Trust me. You created a great story! As an illustrator it is my job to interpret your words visually. I tell your story with my illustrations. Both art and words must be able to stand alone and tell the same story, without each other. Trust me. My artistic interpretation may differ from yours. An illustrator has so many different ideas and will come up with something you may never have imagined. Let me show you another way to make us to shine. Trust me. I am a professional, just like you. We will both agree on a fair and reasonable contract beforehand so there will be no surprises. I will always do my best work. I would never expect anything less of myself. Trust me. We may never actually meet. But professionally we are a team. We are in this together. I so appreciate being a part of our team. I hope you will feel the same way. Trust me. I love what I do. I create and draw and color outside the lines. I can draw a story. I can draw your story.
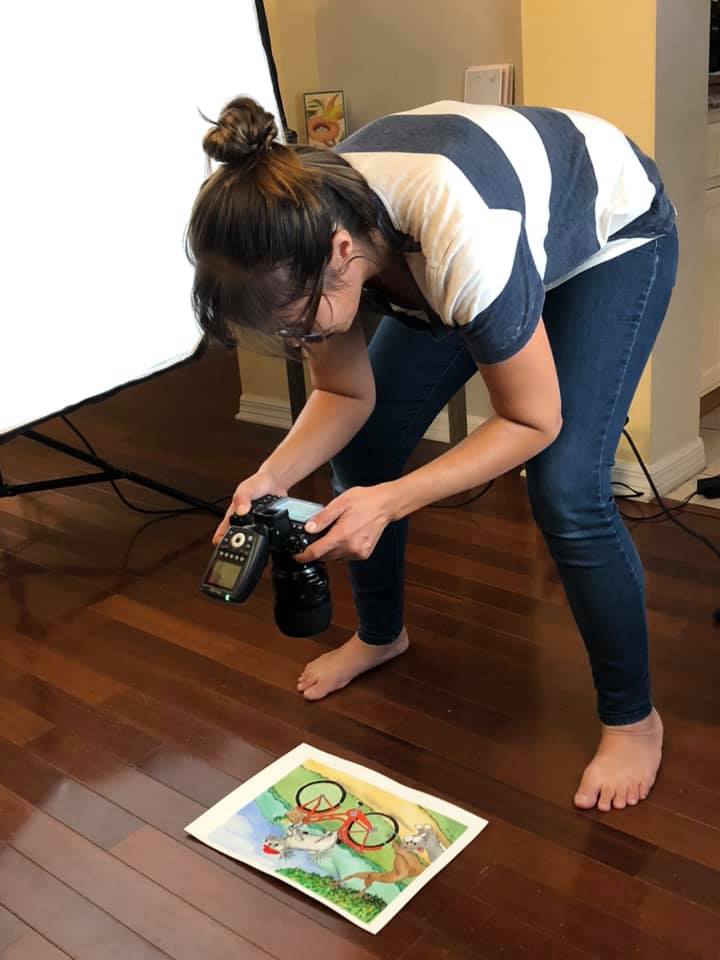
We have a talented guest writer this week, professional photographer Stephana Ferrell, owner of The Inspired Storytellers. Stephana recently took the photos of the watercolor art for our upcoming book Joyride. She has some great tips on how to photograph art for children's picture books. Five Tips for Photographing Art for Picture BooksCongratulations on being so close to publishing! You've got colorful illustrations in hand and there is one step between where you are and approving a layout- getting your tangible prints into digital form. There are two industry standards to making this happen, and this article will cover ways to ensure success when photographing your illustrations. Let's get into it! Tip One: Even Out Your LightingLighting must be evenly spread across the surface of the illustration (not pointed down as this can cause reflections or hot spots). It’s best to use a light source that is close to daylight or “white” color (4500-5500 Kelvin), so incandescent and fluorescent lights should be avoided. Tip Two: Keep Your Position ConsistentCamera distance and angle should be as consistent as possible between pages to ensure you aren’t impacting the scale of your illustrations. Use a tripod when possible or observe your positioning and ensure you keep it the same. Tip Three: Watch Out for DustClean your lens (and sensor, if it applies) before taking the pictures. I like to test the cleanliness of the lens by taking a picture of a white wall or a blue sky. Dust and other spots that you need to address will easily show themselves. Tip Four: Get Rid of Camera Shake
Tip Five: Editing is KeyEditing is just as important as the images you create. Keep in mind which pages will end up being full spreads and crop your images to the right bleed size, ensuring anything that needs to line up does. The final printing color profile also needs to be considered while when making any tweaks to your image files. Ensure your screen is calibrated. Contrast, Exposure, and Tone/Saturation changes you make on screen may not render the same way when it goes to print. Now that you have all of this information as your guide, you are ready to get those illustrations into digital form. Here's a quick recap to follow as you're photographing:
Language in picture books is just as important as illustrations. The words play in the air as they are read aloud and make the storyline dance. Unlike a lot of fiction genres, picture book texts must be designed to be heard. The tiny ears in the audience want language that is fresh, crisp, and fun when appropriate. Don’t worry about having perfect language when you are first drafting your story. Just get your story down. After you finish, and after each round of revision, read your manuscript out loud. Focus on how the words deliver. Ask yourself these questions:
The biggest challenge when cultivating great language is that people read stories aloud differently. Some people will put emphasis on one word and some on another. This can be frustrating when you’re trying to intentionally create a rhythm or have specific words stand out. The best way to address this is to have other adults read the story to you while you take notes. You could also ask them to record a video of them reading and send it. This helps if they live far away and also allows you to listen the replay. Language is something I personally rework over and over in each round and continuously tweak. If I’ve read it so many times that I can’t hear the distinctions anymore, I will record myself reading and listen to the recording. Every manuscript you write, you will improve with your language. The more you write, the more you will improve. So get those hands and ears ready and get to writing!
It may not be intuitive to think about including negative emotions in a children’s book. After all, we don’t want to make the little guys cry, right? But including a moment of sadness in your picture book narrative can make for a more complete emotional journey for your character, and your reader, too. Think about adult stories, particularly one with a hero. There is always a moment when it looks like the bad guy is going to win, when the character is at their darkest place. All seems to be lost. Luke Skywalker’s hand has been cut off. Voldemort has Harry trapped. Then it’s time for the big finale where the hero defeats the odds and wins. While there (hopefully) aren’t dark, scary bad guys in picture books, including a moment of sadness or a feeling of loss for the character deepens the narrative. While the antagonist might be a character, it could also be an emotion such as fear, or a concept such as rejection. Examples of Moments of Sadness in Picture Books In Llama Llama Red Pajama by Anna Dewdney, Baby Llama is put to bed but then realizes he wants his mom to come back into the room. He makes several attempts to get her attention but she is downstairs and doesn’t hear him. There is an incredible spread with an expansive dark blue background and Baby Llama sitting in the darkness with a blanket pulled up over half his face. His eyes are wide and he wonders if his mom is gone. The feeling here is clear: fear. His dark moment is when he thinks his mother could be gone forever. The Snowy Day by Ezra Jack Keats also has a sad moment for the character. Peter spent his whole day exploring the wondrous, snowy outdoors. He brings home a memento of this special day in his pocket, a snowball. Of course when he wakes up and checks his coat pocket, the snowball has melted. His joy from the day before is seemingly gone. Another example is in It’s Christmas, David by David Shannon. David has been enjoying all things holiday...cookies, ornaments, making his list...and trying hard to be on the nice list. Finally the big day comes. When he wakes up on Christmas morning, he runs to the living room only to find a lump of coal. Reasons to Include a Moment of Sadness in Your Picture Book Manuscript It strengthens your character’s emotional journey and makes your story more compelling. Facing a challenge or dark time gives a more complete character arc and increases the reader’s attachment to the character. Were you a little upset that I stopped in the examples above before knowing what happened to those characters? Even in the short descriptions of the stories, you wanted to know that things turned out all right. Surely that mom came back to Baby Llama, right? That kid got his presents, right? Experiencing challenges makes us want to root for the characters even more. Children relate to negative feelings. If you’ve been around a child recently, you know their day can be quite an emotional roller coaster. From getting the wrong color cup, to their brother picking the TV show, to having to sing the song on stage in front of everyone...there are a lot of negative emotions during their days. They feel angry, sad, scared, overwhelmed, and everything else under the rainbow. They relate when a character is afraid like Baby Llama or sad like Jack and his melted snowball. Including negative emotions in stories shows kids that other people feel the same way they do and can also help them learn how to manage those feelings by seeing the character’s example. It makes the ending that much more sweet. Think about the emotional journey of a book character as a line. If the line is flat because the emotion has been flat throughout, then it peaks at the climax, the jump from just before the climax to the peak is minimal. If we have a big dip before the climax, the jump up to the peak is huge! We’ve gone all this way! The happy ending has significantly more emotional impact because of that great low we had before. When Mama Llama finally comes, we are so relieved. Phew. Baby Llama was really upset and afraid. We are so happy they are back together. When David realizes the coal is just a bad dream and he wakes up and finally sees his presents, we are thrilled. He worked hard and deserved those. Of course a moment of sadness may not fit the structure of every picture book. Books such as the How Do Dinosaurs…? series by Jane Yolen don’t follow a typical narrative structure and a moment of sadness wouldn’t fit in the question and answer style she uses. Examine your manuscript and ask yourself if you follow a narrative structure and if you are trying to include a character arc. See if a moment of sadness would punch up the emotional impact of your story. Remember, if the kids connect with your character more, the more likely they will be to pick up your book over and over again. Happy writing!
Picture books are primarily a print market. Kids and parents love holding the books in their hands and interacting with them, pointing to pictures and turning pages. Deciding the best way to make your physical product involves some decision making and figuring out what is best for you and your book. Here are the options, along with the benefits and drawbacks of each, to help you decide. Printing Choices The two main ways to indie print picture books (or any book) are to offset print or use a print-on-demand service. Offset printing is when you put in an order with a traditional book printer such as Thomson-Shore or Phoenix Color and they do what is called a print run. You pay the money up front for an agreed-upon amount of books. When the print run is finished, you have all of your books ready to sell. Print-on-demand or POD is a relatively newer service in the history of book printing. All you do is upload the files to a service such as Amazon or Ingram Spark and they print copies after they are purchased and mail them to the customer. If you want to have a home stock of books, you will need to order from the printing service and you only pay for the exact amount you want. Offset Printing Benefits and Drawbacks Offset printing is number one when it comes to print quality, especially for picture books that have color interiors. You also have more print options with an offset printer. You can pick your trim size, get foil embossing, do lift-the-flaps, even get holes cut in your pages. You can customize whatever you want! However, when you offset print you have to pay for an entire print run. This can get expensive and is risky if you end up not selling very many books. Also, now you have an entire print run. Where are you going to store those books? You will have to do some research and see if you want to apply for a distributor, store them at a warehouse that does pack-n-ship, or keep them at home/a storage unit and mail them yourself. But another benefit is the per-unit price. The higher the total print run, the cheaper the books are per book. Print-on-Demand (POD) Benefits and Drawbacks The benefits of POD are easy to see: significantly less up front cost and much easier product management. It is the most economical option. Plus services that do POD also list and ship your books for you. Double bonus! Here comes the big drawback: print quality. Because these books are printed quickly and shipped out right away, the printing methods give less rich color and quality controls aren't as well regulated. You are also limited in your options and must chose a trim size from a predetermined list and can't get any of the special features. Some POD printers, such as Amazon, only print paperbacks. Finally, the price of the book per unit stays the same whether you print two books or two thousand. It becomes the least economical option if you need to print large quantities of books. The best method is going to be what is right for your goals, your time, and your budget. What is most important to you? What can you honestly manage? How much money do you have to spend? You also don't have to be married to one printing method. You can make a judgement call for each project and see what works best for you. I personally do both, pending the project and what I deem is important. Happy publishing!
Let's start with a doozy of a sentence: The short-legged, fluffy, orange Pomeranian walked down the dirty sidewalk, past the shady green trees, and into her large square yard with the tulips, daisies, and daffodils next to the two story blue house with the wrap-around porch. While this does give you quite a visual, it's pretty exhausting to read and a bit long for the attention of a three-year-old. Visual description is often a place where a picture book author can make deep cuts, or not include it all. Here are three reasons why you can toss those adjectives out the door. Written Description Is Redundant One great thing about picture books is they have pictures! The pictures do the work of showing the visuals so the words don't have to. Why tell the reader and listener the pig is wearing a red rain jacket with yellow buttons when they can look at the page and see it? Or that the park has a swing and a slide and a bench and a...you get the idea. The park will be there on the page. Let's go back to the sentence with the Pomeranian. Reread it and think of everything written there that would be shown in pictures. The short-legged, fluffy, orange Pomeranian walked down the dirty sidewalk, past the shady green trees, and into her large square yard with the tulips, daisies, and daffodils next to the two story blue house with the wrap-around porch. Most of the words in this sentence can be cut out. Illustrators Don't Like It When an illustrator gets a manuscript, they develop their own vision for the story. They don't want to be told what every tiny detail looks like. That would leave no room for them to experience and interpret the story with their own creativity. Think about it. Before you wrote a story, would you want someone telling you every single detail to write? You may want to cling to the idea that the pig must be in a red raincoat with yellow buttons. After all, that's how you pictured it as you wrote. But is that really the most important part of the story? Will the story not be the same if the pig is in a blue raincoat, or gasp!, no raincoat at all? Giving the illustrator that creative freedom results in a better product because they use their expert artistic and visual skills to come up with things that are often even better than what you imagined. This doesn't mean you shouldn't include a visual detail that is essential to the story. But you should leave room for creative interpretation by the illustrator as much as possible. It Inflates Word Count Getting the word count down is often one of the biggest challenges of revising picture book manuscripts. Traditional publishers want manuscripts to be around 500 words or less. There is more wiggle room for indies, but it should be below 1,000. (See this post on word count for more info.)
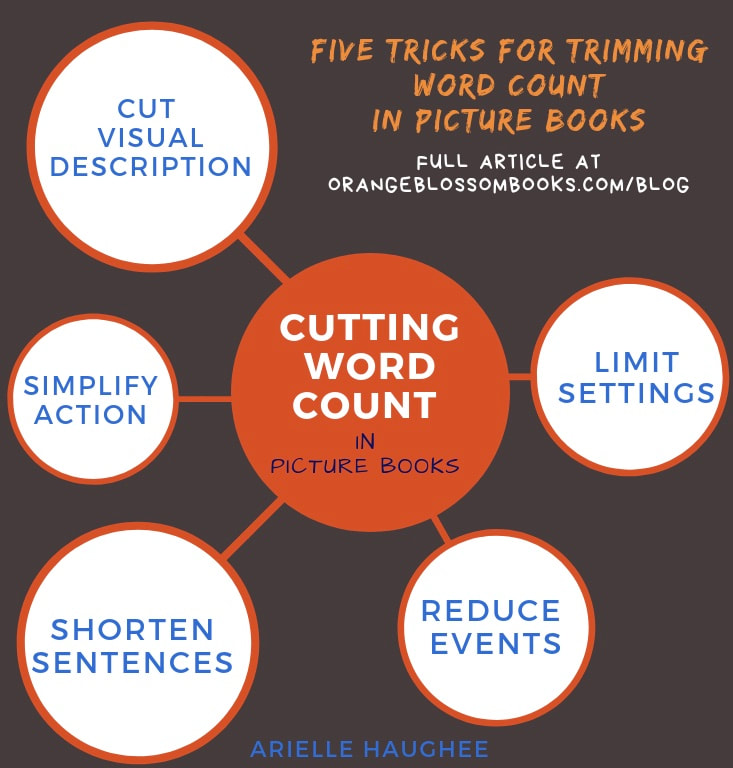
You have to chop, chop, chop as much as you can. Visual description can take up a lot of those precious words and like I said earlier, it's redundant with the pictures. Trim it wherever you can and don't let it inflate your word count. (See this post for other ways to cut word count.) Happy writing! A picture book needs to use concise yet enticing language that lends itself well to being read aloud. The challenge? Doing all that in less than a thousand words, in fact, as close to 500 words as possible. First drafts are often too long since all you are doing is capturing your ideas and putting them on the page. Then it is time to revise, trim the fat, slice and dice...whatever you like to call it. A picture book manuscript is already fairly short, so what exactly can you cut? Here are five tricks to trim down those words: Shorten Sentences This is the first place to start. Take a close look at your sentence structures. Do you have sentences with several clauses strung together? Long compound sentences? Search your manuscript for lengthy sentences and see where you can chop. Become a hound on the hunt for any extra words. Look for adverbs and adjectives and determine if they are truly necessary. The word “that” is often a filler word when not specifying an object. (If you are looking for more tips at the sentence level, see Tighten Up! Seven Tips for Decluttering Your Sentences, an article I wrote for the Florida Writers Association.) Cut Out Visual Description Visual description, such as describing the setting or what the character looks like, is usually left out of picture books. Most obviously because the pictures show the visuals and it would be superfluous. The second reason is that illustrators do not want to be told how things look. There needs to be room for creative interpretation. (More on this in another post.) So look through your story and see if there are any lines that tell what something looks like and ask yourself if they are really necessary or if the pictures will show it. Simplify Action A common mistake is to assume kids need tons of action in a picture book in order to keep their interest, making it more like a TV show. Characters are here then there then up then down then karate chop! Big action isn’t a bad thing, but too much action is. The first problem is that it’s hard for children to follow. Adults, too. Second, an illustrator doesn’t create an individual scene for every single little action in the book. (Think about transitions like opening doors and entering rooms.) So if you have too much action, an illustrator won’t be able to draw it all anyway. Limit your action to what is essential to your plot. Ask yourself what *must* the character do and limit the number of obstacles to what will fit within the word count. Which leads to the next tip… Reduce the Number of Events Oftentimes writers get excited about the idea behind a picture book and add in too many events. My very first picture book attempt involved a tough-guy Easter bunny and his peppy sidekick. While I was developing the story, I planned a kooky system for how they traveled around the world. The first few events in the book where all about glitches in the system before they got to where the story actually started. It was exciting and fun and I loved it. It was also totally unnecessary. My word count was a shocking 2,000 words. It broke my heart but those events had to be cut. A good trick to help focus your events is to write your logline: one sentence saying what your book is about. Events need to be directly related to the direction of the book. How many events should there be for a picture book? It depends on the structure of the book. I tend to use a simplified version of the three act structure, so three events or event groups. Examine the structure of your book and determine if there are any events that can be left out and the end result would be the same. That may be an indicator they can be cut. Limit Settings It’s not always necessary to show every setting in a book. A character may come home from school and have to walk through the foyer, then the living room, then the hallway before getting to her bedroom. Save yourself some words and jump straight to where she needs to be. Limiting settings also goes hand-in-hand with simplifying action. If you stick to only the necessary scenes that involve the obstacles and the character’s goal, then you will see which settings are integral and which can be cut. Once again, the structure of the book will determine the number of settings. Keep Working On It It takes me several months to work over a manuscript and get it where it’s ready to publish. I revise over and over and over, getting lots of feedback from other picture book authors. Keep coming back to your manuscript and asking yourself what is essential to your story. With time and effort, you’ll be able to cut out the excess and highlight what is truly important.
Happy writing! Getting the word count correct is a very important skill for anyone looking to publish picture books. Agents and publishers won’t accept manuscripts with high words counts. Distributors won’t select them for sales representation either. Why? Long picture books don’t sell very well anymore. Why Long Picture Book Manuscripts Don’t Work Small Press United, an indie book distributor, has this in their Reasons for Declining information: “a children's picture book with pages that have large amounts of text no longer works as a picture book.” Recent market surveys show that children age out of picture books at six, earlier than previous generations. Kids are moving up to early readers and chapter books younger than before. This in and of itself is a great thing. We have better readers! But it does raise a problem for picture book authors and publishers. We need to adjust our standards to match what children need and ultimately, what sells. Authors also need to keep in mind the dual audience of picture books: the children hearing the story and the parent who reads it. Parents are the ones purchasing the books and reading them aloud until the child is old enough to read on their own. If there is one thing that drives me crazy during story time at night, it is a picture book that goes on and on and on. Those books often mysteriously disappear under the bed or at the very bottom of the book bin. As a parent, I won’t buy a picture book with a lot of text. Picture Book Word Count: Here’s the Magic Number For fiction or creative nonfiction picture books (not informational), the current word count goal is 500 words. Yup, that’s it. If you are planning to traditionally publish, it is significantly more likely you will be successful if you stick to this word count. Yes, you can go to Barnes and Noble and likely find a longer picture book on the shelf. This book is probably either a classic or written by an established author. Stick to 500 words to increase your chances of acceptance. If you are self-publishing, you do have some leeway but remember that you want to be competitive in the market with all the other picture books. You also don’t want your adorable-but-wiggly audience getting bored. Keep it under 1,000 but try to get closer to 500. A Quick Way to Practice If you write adult fiction, one of the best activities you can do to get comfortable with the 500 word format is to practice flash fiction. It teaches you to squeeze your entire story in a low word count and helps you focus on every single word, cutting anything extra.
If you are new to writing or are only interested in writing picture books, look for my next blog post: Five Tricks for Trimming Word Count in Picture Book Manuscripts. Happy writing! |
AuthorArielle Haughee is the owner and founder of Orange Blossom Publishing. Categories
All
|
Proudly powered by Weebly



 RSS Feed